Are you tired of slow internet speeds or unreliable connections on your iPhone? You’re not alone. Many users overlook a simple yet powerful tool that can enhance their browsing experience: DNS settings. The Domain Name System (DNS) is like the phonebook for the internet, translating user-friendly domain names into IP addresses that computers understand. By changing these settings on your iPhone, you could unlock faster loading times and improved security.
In this guide, we’ll explore how to change your iPhone’s DNS settings easily and effectively. Whether you’re looking to boost performance or bypass restrictions, adjusting these configurations may be just what you need. Let’s dive in!
Understanding DNS and its Importance on iPhone Devices
DNS, or Domain Name System, plays a crucial role in how we access the internet. Imagine trying to remember every website’s IP address; it would be nearly impossible. DNS simplifies this process by converting easy-to-remember domain names into numerical addresses that computers use.
On iPhones, a well-configured DNS can significantly impact your online experience. It not only helps load websites faster but also enhances security features like phishing protection and content filtering.
Different DNS providers offer various advantages. For example, some focus on speed while others prioritize privacy or parental controls. By understanding how DNS works, you can make informed decisions about which settings best suit your needs and preferences on your iPhone.
Step-by-Step Guide on Changing DNS Settings on iPhone
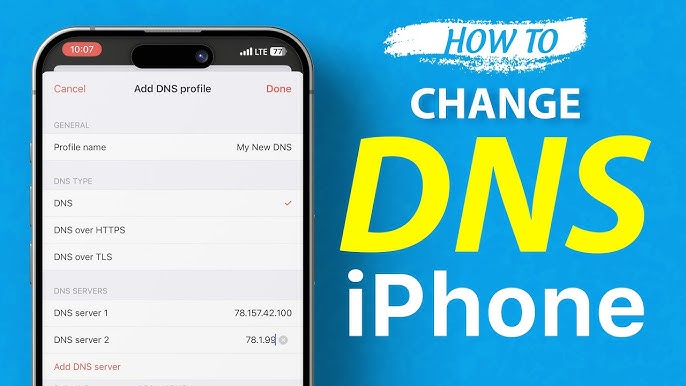
Changing the DNS settings on your iPhone is a straightforward process. Start by opening your device’s Settings app, which can be found on your home screen.
Next, tap on “Wi-Fi” to view the networks available. Locate the network you’re currently connected to and click on the small information icon (i) next to it.
Scroll down until you find “Configure DNS.” By default, this will be set to Automatic. Tap it and switch to Manual.
Now you can enter new DNS server addresses. You may want to use popular options like Google’s 8.8.8.8 and 8.8.4.4 or Cloudflare’s 1.1.1.1 for improved performance.
After entering the desired addresses, make sure they are saved by tapping “Save” at the top right corner of your screen before exiting Settings.
Benefits of Changing DNS Settings on iPhones
Changing DNS settings on your iPhone can greatly enhance your browsing experience. A different DNS provider often means faster internet speeds. This is because some servers are more efficient at routing requests, reducing loading times for websites.
Security is another compelling reason to tweak these settings. Some third-party DNS services offer built-in protection against phishing and malware. This adds an extra layer of safety while you browse or use apps.
Moreover, customizing DNS allows access to region-restricted content. You might find that streaming services perform better when routed through a specific server.
Changing the DNS can lead to a more reliable connection overall. If you’re facing frequent disconnections or slow performance, trying out new DNS options may resolve these issues effectively.
Common Issues to be Aware of When Changing DNS Settings
Changing DNS settings on your iPhone can enhance speed and security, but it’s not without pitfalls. One common issue is incorrect entries. Even a small typo can lead to connectivity problems.
Another concern is compatibility. Not all DNS servers work seamlessly with every network. Users might find themselves unable to access certain websites or services if the chosen server has restrictions.
Some users may experience slower speeds after switching DNS providers, especially if the new server isn’t optimized for their location.
Temporary issues like dropped connections can occur during the transition period as well. It’s essential to be patient while your device adjusts to the new settings.
Remember that changes may affect specific apps differently, leading to inconsistent performance across various platforms on your iPhone. Always monitor app functionality after making adjustments.
Alternative Methods for Changing DNS Settings on iPhones
If the standard method for changing DNS settings on your iPhone feels too tedious, alternative approaches are available. One popular option is using a third-party app designed specifically for DNS management. These apps often provide user-friendly interfaces and additional features like customizable ad-blocking.
Another way to adjust DNS is through your home router’s settings. By changing the DNS server at the router level, all devices connected to that network will automatically use the new settings. This method can be particularly useful if multiple devices require configuration.
Additionally, you might consider utilizing a VPN service that allows custom DNS options. Not only does this enhance privacy and security, but it also gives you control over which DNS servers are used while browsing.
Experiment with these methods to find what works best for your needs and preferences when it comes to modifying DNS settings on your iPhone.
How to Troubleshoot DNS Issues on iPhones
Troubleshooting DNS issues on your iPhone can be a straightforward process. Start by checking your Wi-Fi connection. Make sure you’re connected to the network and that it’s stable.
Next, try resetting your Network Settings. Go to Settings > General > Transfer or Reset iPhone > Reset > Reset Network Settings. This action will erase saved networks and passwords, so be prepared to reconnect afterward.
If you still face problems, consider flushing the DNS cache. Although iPhones don’t have a direct option for this, simply toggling Airplane Mode on and off may help refresh the connection.
You might also want to test different DNS servers like Google (8.8.8.8) or Cloudflare (1.1.1.1). Sometimes changing those settings can resolve connectivity issues.
If all else fails, restarting your router could clear up any lingering problems with network communication between devices.
Conclusion
Understanding DNS and its Importance on iPhone Devices
DNS, or Domain Name System, is like the phonebook of the internet. It translates human-friendly domain names into IP addresses that computers understand. This process allows you to easily access websites without memorizing complicated numeric addresses. On iPhones, a well-configured DNS can enhance your browsing speed and security while providing more reliable connections.
Step-by-Step Guide on Changing DNS Settings on iPhone
Changing your DNS settings on an iPhone is straightforward. Here’s how to do it:
1. Open **Settings** from your home screen.
2. Tap on **Wi-Fi**.
3. Find the network you’re connected to and tap the small info icon (ℹ️).
4. Scroll down and select **Configure DNS**.
5. Change it from ‘Automatic’ to **Manual**.
6. Now, enter your desired DNS server addresses by tapping “Add Server.”
7. Save your changes by touching **Save** at the top right corner.
That’s all there is to it! With just a few taps, you can improve your online experience significantly.
Benefits of Changing DNS Settings on iPhones
Switching up your iPhone’s DNS settings comes with several perks:
– Enhanced Speed: Some public servers are faster than those provided by ISPs.
– Increased Security: Certain third-party DNS services offer protection against phishing attacks and malware sites.
– Content Filtering: You can block adult content or ads through specific family-friendly options available in certain services.
These benefits contribute to a smoother overall browsing experience while using various apps or streaming content.
Common Issues to be Aware of When Changing DNS Settings
While changing these settings is beneficial, it’s crucial to stay vigilant about potential issues:
– Connectivity Problems: Incorrectly entered server addresses may lead to connectivity errors or slow speeds.
– Incompatibility Issues: Some applications might not work correctly if they rely heavily on specific ISP configurations.
Being proactive in checking for these problems will ensure uninterrupted service as you tweak


